
 monday.com · Guide
Onboarding is where good intentions go to die. A new hire starts, three teams each own a slice of the setup, and the plan lives in a shared document nobody updates. IT provisions the laptop late, the manager forgets the day-one intro, and by week two everyone assumes someone else handled the rest. Building an onboarding checklist in monday.com turns that scattered handover into a single, trackable object that sits on the item for each new person and shows exactly what is done and what is not.
This is a practical walkthrough. You will lay out the phases of onboarding as sections, assign each step to the right owner across HR, IT and the manager, set due dates relative to the start date, and then save the whole thing as a template so every future hire gets the same checklist in one click. After that, tracking is the easy part.
Why a checklist beats a shared doc
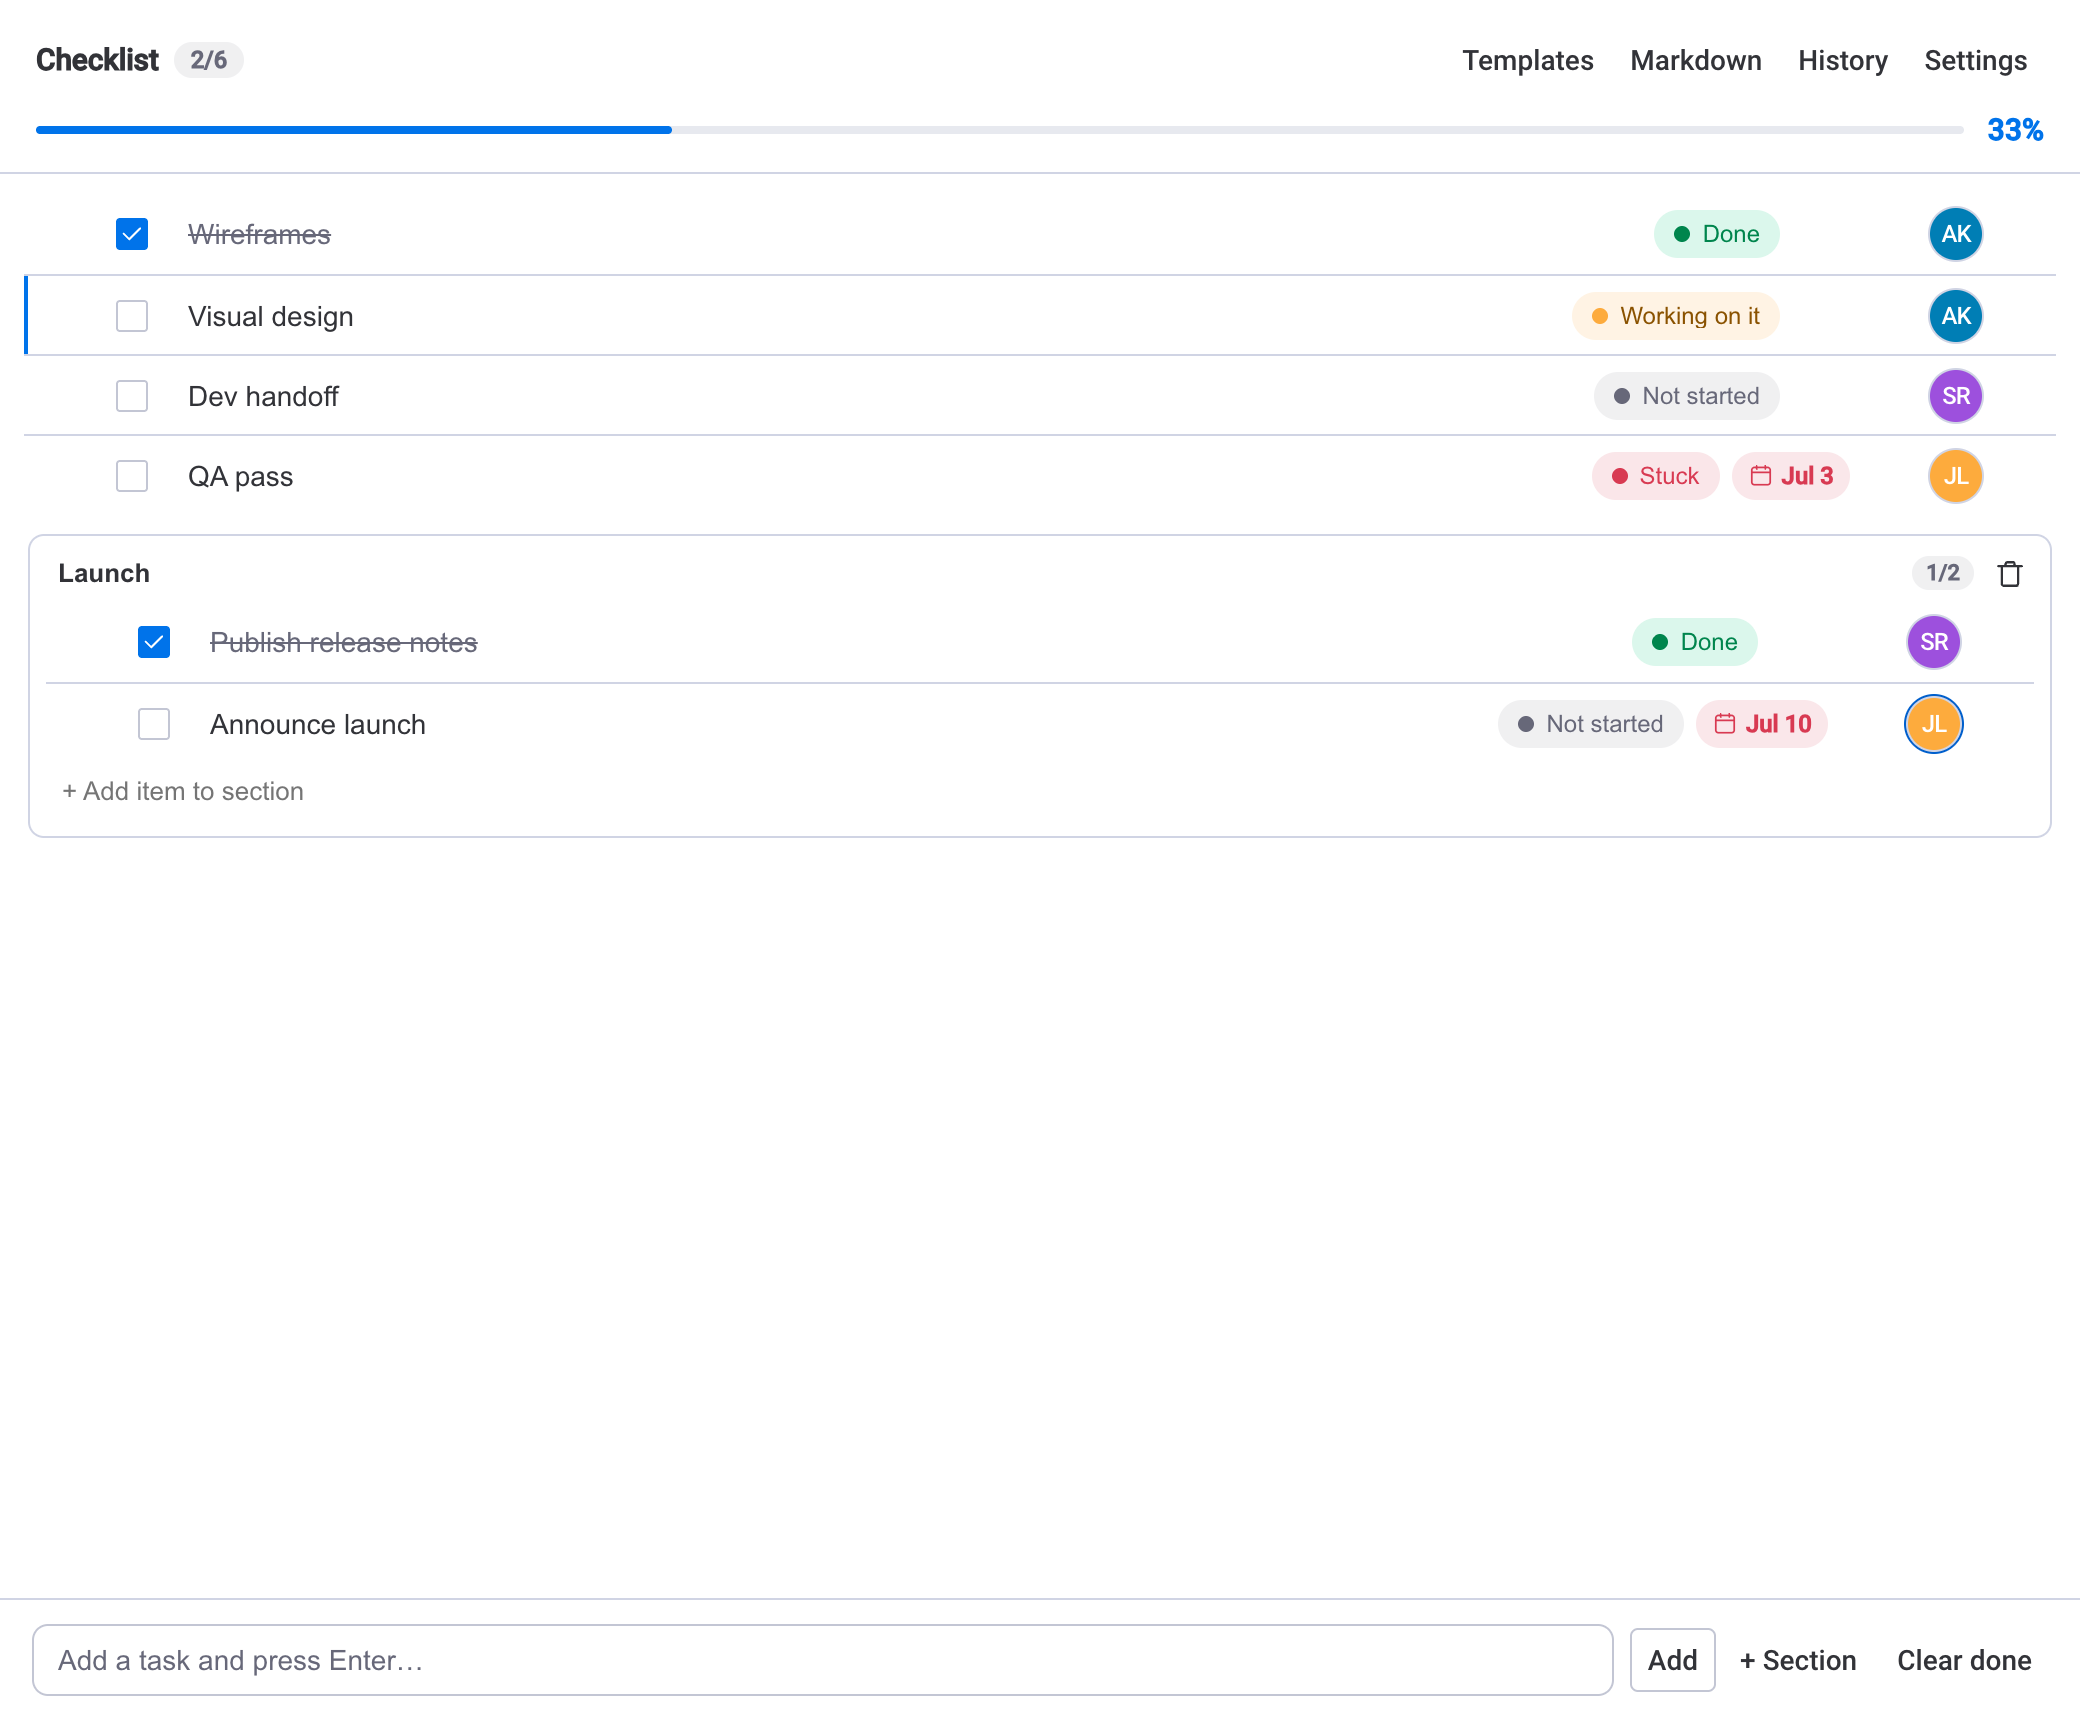
A shared onboarding document is a description of a process, not the process itself. It has no state. You cannot look at a paragraph and know whether the equipment was ordered, because a document only holds text, not completion. A checklist holds both. Each step is either done or not, and the item carries a live progress bar, counter and percentage so the status is legible at a glance.
The other problem with a doc is ownership. In a document, "IT to set up accounts" is a sentence. On a checklist step you can attach an actual owner picked from the board's people and a due date, so the work is assigned rather than merely mentioned. If you have weighed the alternatives, our guide on checklists versus subitems in monday.com covers when each fits; for onboarding, where the same repeatable list runs per person, a checklist is the natural home.
One item per new hireKeep one board row per new starter and attach the onboarding checklist to that item. The item becomes the single source of truth for that person's setup, and the board becomes your live view of everyone in progress.
Structure the onboarding checklist in phases
Onboarding is not one list, it is a sequence of phases. Group your steps into sections so the checklist reads like a timeline rather than a flat pile of tasks. A structure that works for most teams looks like this:
- Before day one — order the laptop, create accounts, send the welcome email, prepare the desk or remote kit, share the first-week schedule.
- Week one — manager intro and goals conversation, IT walkthrough and access checks, team introductions, first tools and systems training, HR paperwork completed.
- First month — role-specific training, first real task assigned, 30-day check-in booked, feedback loop opened, probation goals confirmed.
Sections give you two things at once: a readable order for whoever is running the onboarding, and natural checkpoints. When "Before day one" is fully ticked, you know the person can actually start on Monday. Add, rename and reorder steps freely until the shape matches how your team really onboards.
Assign owners across HR, IT and the manager
Onboarding fails at the handoffs, so the assignment step matters more than any single task. Give every step an owner picked from the board's people. In practice that spreads across three roles: HR owns paperwork, policy and the welcome sequence; IT owns hardware, accounts and access; the manager owns intros, goals and the check-ins.
Because each step can also carry a status, a step is not just done or not done. It can sit in progress, be blocked waiting on something, or be marked not applicable for a particular hire. That distinction is what stops the classic "I thought you had it" gap, because a blocked IT step is visibly blocked rather than silently missing.
A doc tells you what should happen. A checklist with owners and due dates tells you who is doing it, by when, and whether it happened.
Set due dates relative to the start date
Every onboarding runs on the same clock: the start date. So set each step's due date relative to that anchor rather than to a fixed calendar date. "Order laptop" is due a week before start; "accounts created" the day before; "30-day check-in" a month after. When you later reuse the list for a new hire, you shift the dates to their start date and the whole schedule moves with them.
The completion data does not have to stay hidden inside the item, either. Checklist progress syncs to a number or status column, so each new hire's percentage shows in the board table and in dashboards. If you want the board's own automations involved, the next due date can be mirrored to a native Date column, which lets monday.com fire reminders or notifications off the dates your checklist is already tracking.
Keep dates honestRelative due dates only help if they reflect real lead times. Ask IT how long hardware actually takes to arrive and set the "order laptop" step to beat that, so "Before day one" is genuinely finished before day one.
Save it as a template for every new hire
You should build this checklist once. Save the finished list as a reusable template, and every future hire gets the same steps, sections and owners applied to their item in one click. No copy-paste, no forgotten step, no drift between the last hire's onboarding and the next one's.
Templating is what makes onboarding consistent at scale. The manager who onboarded someone in January runs the identical process in June, and a new manager inherits the same standard without having to reconstruct it. For the mechanics of building, editing and applying templates well, see checklist templates in monday.com, which goes deeper on standardising repeatable work.
After applying the template, you only tailor two things per hire: shift the due dates to their start date, and swap any owner that differs for that role. Everything else is already in place. And because the app runs entirely on monday.com infrastructure, with data stored in your own account and never leaving it, the checklist and its templates live where the rest of your work does, with no external database to manage.
Track every new hire across the board
Once several people are onboarding at once, you need the bird's-eye view. The Board View lists every item's checklist progress in one table, with an overview panel and per-item completion, so you can see all your active new hires and spot the one whose "Week one" is stalling before it becomes a problem.
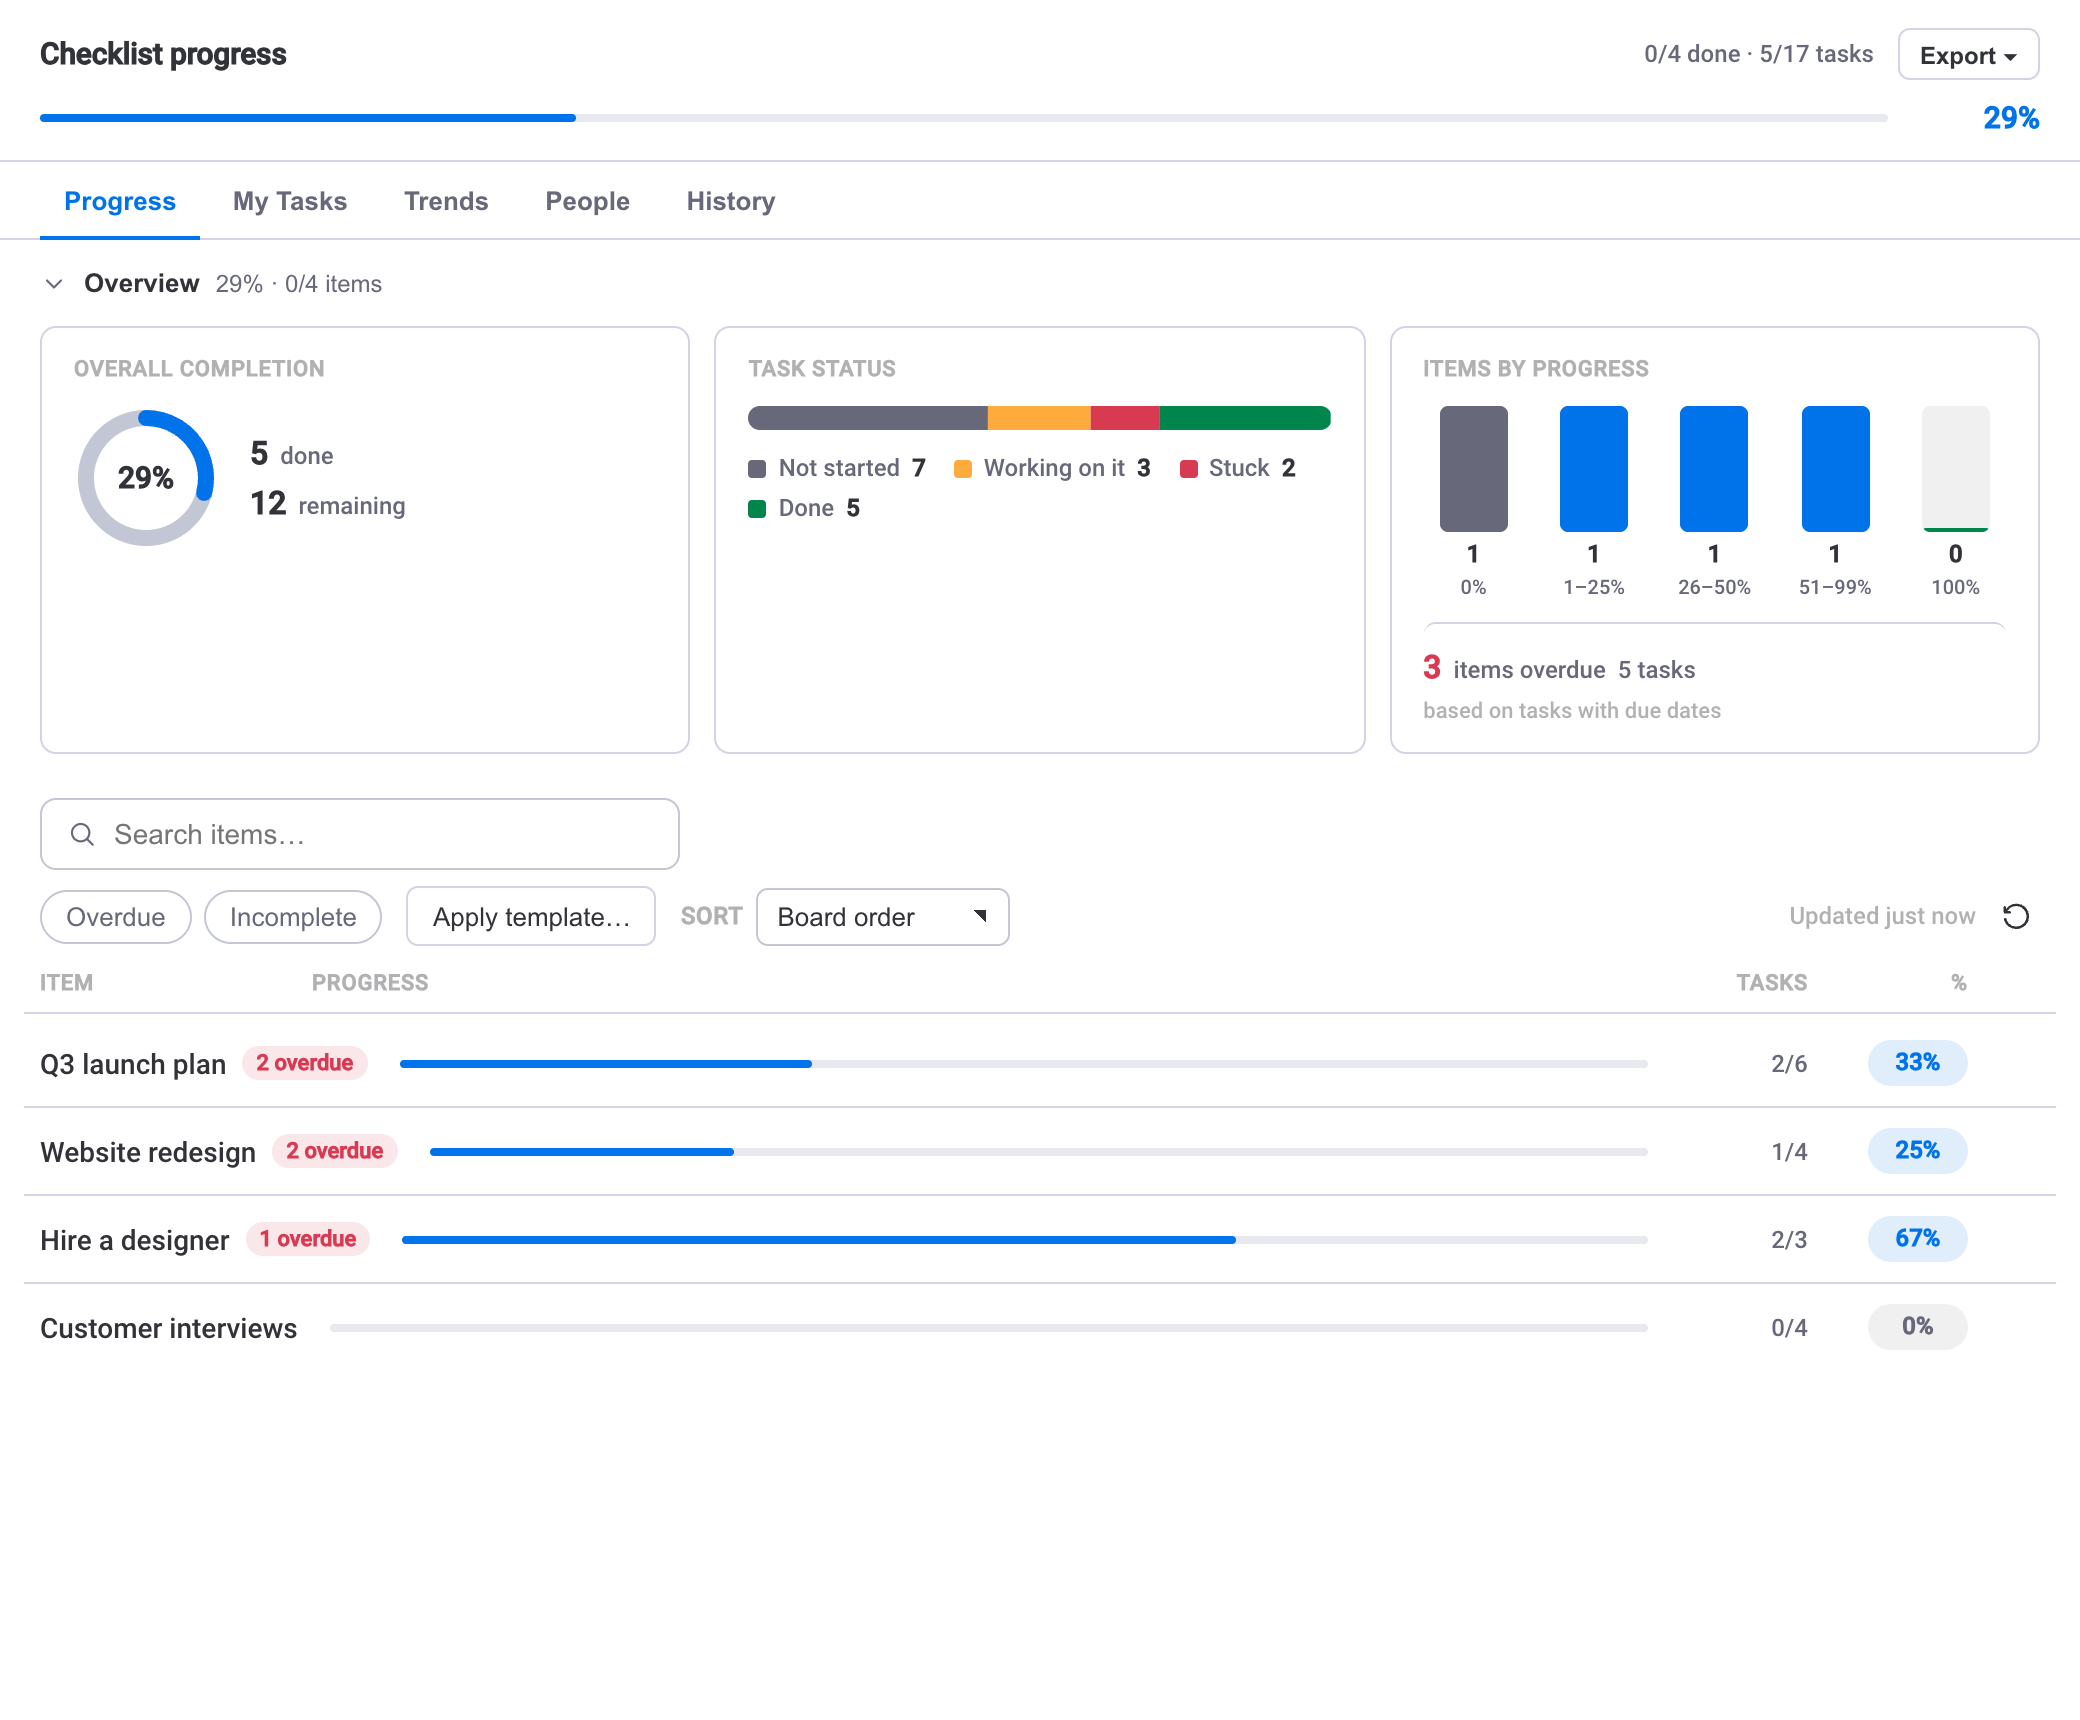
Owners get the reciprocal view. The My Tasks view shows every checklist task assigned to a person across the board, grouped by due date, so the IT lead sees all their onboarding steps for all incoming hires in one list rather than hunting item by item. That is the difference between a process that is assigned and one that is actually actioned. For a fuller treatment of monitoring across boards and dashboards, read how to track checklist progress across your monday.com boards.
With sections for the phases, owners across HR, IT and the manager, dates anchored to the start day, a template for repeatability and the Board View and My Tasks for tracking, your onboarding checklist in monday.com stops being a document people ignore and becomes the thing that runs the onboarding. You can also point the SOP & Compliance Checklists app at any existing board and turn its items into checklists without moving your data anywhere else.